Mint Juleps & The Run for the Roses
by Danielle Demers
This DIY project was originally created for and published by the Horse & Style Magazine in their Weddings ’17 issue. Learn more at horseandstylemag.com
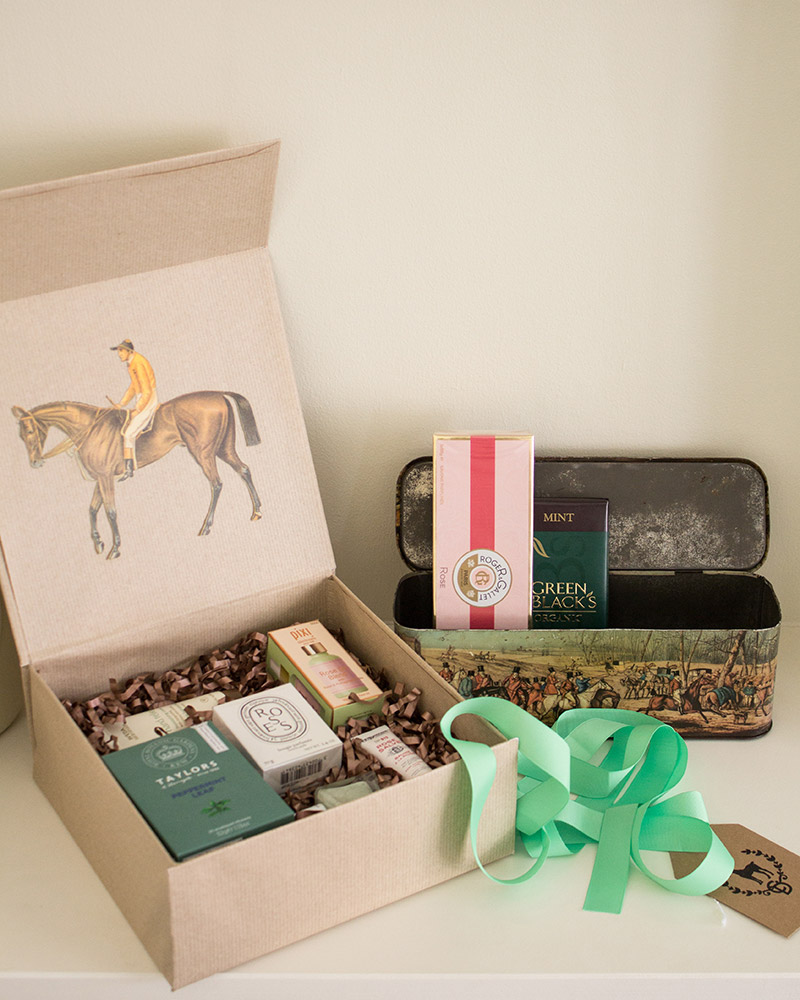
Gorgeous hand-crafted boxes filled with personally curated, indulgent gifts your bridesmaids will be delighted to receive. Equestrian inspiration is at the core, of course!
Materials:
- Large gift boxes or wooden boxes
- Kraft or wrapping paper (if needed)
- Scissors
- Clear tape
- Double-sided tape
- Tinsel or tissue paper
- Horse art prints –OR–
- Equestrian-themed wrapping paper
- 6′ of wide ribbon
- Gift tags
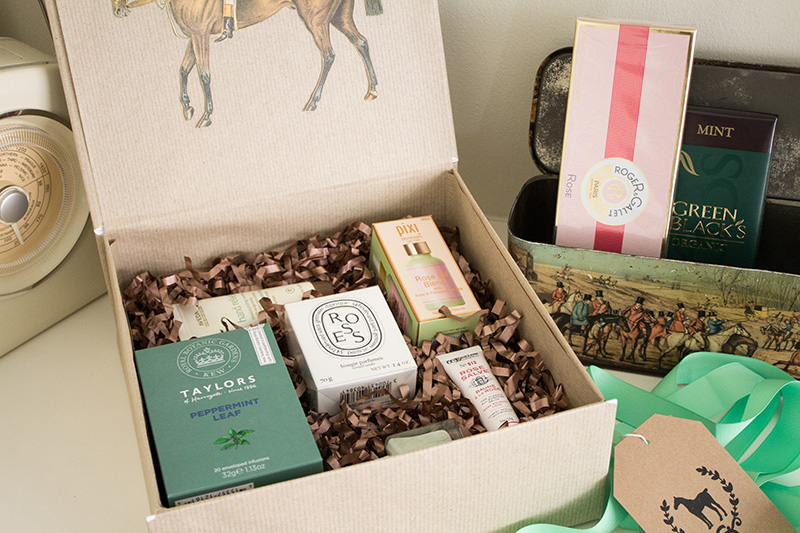
Gift items pictured:
ROSE:
- Diptyque ‘Roses’ Candle
- C.O. Bigelow Rose Salve Lip Balm
- Pixi Skintreats Rose Oil Blend
- Roger & Gallet ‘Rose’ Perfumed Soap
MINT:
- Green & Black’s Mint Dark Chocolate Bar
- Taylors of Harrogate Peppermint Leaf Tea
- Essie Gel Couture Nail Polish in ‘Zip Me Up’
- Aveda Hand Relief Rosemary Mint Moisturizing Creme
ADDITIONAL IDEAS:
- Mini mint julep ingredients
- Silver julep cup
- Equestrian-themed stationery
- Chocolate truffles
- Mint exfoliating bath scrub
- Pashmina
Steps:
1. Spend some time brainstorming which gifts you would like to give your bridesmaids and how you would like to present them. A well-planned bridesmaid gift box can accommodate every budget, theme and color palette. The format also allows for quite a bit of creativity and customization, making for a truly unique and personal gift.
I looked to eBay, Etsy and even my own assortment of gift boxes, papers and gift tags while gathering supplies. A good-sized gift box you already own can be covered in kraft paper or an equestrian-themed wrapping paper. As an alternative to purchasing boxes, this will help to cut costs; freeing up funds to put toward the actual gifts inside.
2. Once you have made your purchases, bring together all of your materials. Plan how you would like to decorate the box and how the gifts you are giving your bridesmaids will fill the space of the interior. Visualizing everything together first will make each subsequent step more intuitive, and the process will flow.
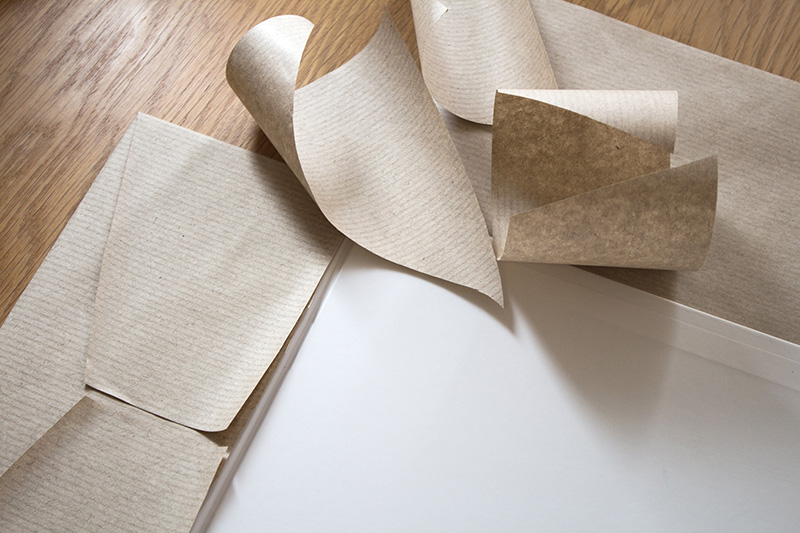
3. To re-purpose a gift box by covering it in paper, start by laying the box completely flat over the paper you are using (this may involve a bit of box disassembly). Cut the paper a few inches wider and taller than the box on all sides. Starting from one end, fold the paper over the edges of the box and secure with clear tape. Work your way around the box, taping and cutting the paper where needed to create a custom fit.
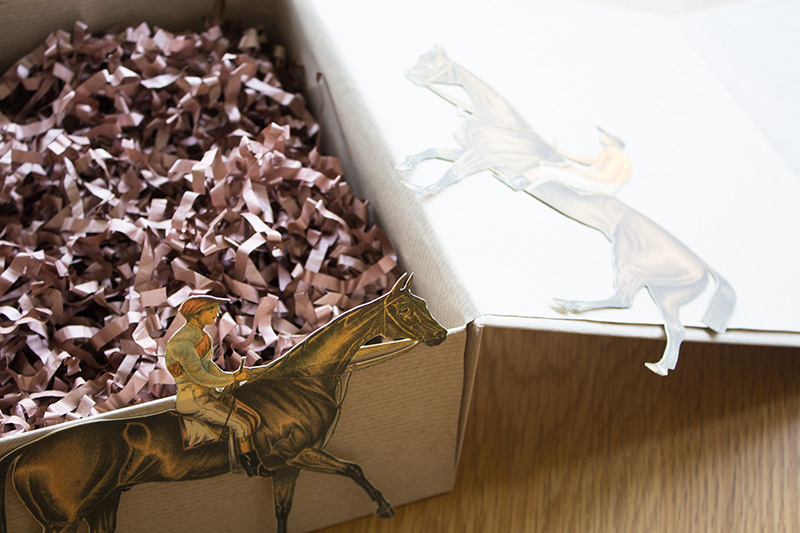
4. If you have covered the box in plain kraft paper, or if the boxes you are using are solid colored, they will benefit from a bit of decoration. Lining the box in a patterned, equestrian-themed paper is a simple way to add interest. Alternatively, there are some lovely horse art prints to be found on both Etsy and eBay. I found a set of four vintage 9″x12″ race horse prints from an eBay seller for around $9.00 total including shipping. I used an X-Acto knife to cut the horses and jockeys out from the background, and adhered them both outside and inside the cover of the box using double-sided tape.
5. Fill the box with tinsel or tissue paper so that the gifts inside will be secure and protected.
6. Arrange your bridesmaid gifts in the box. This step is essentially like assembling a puzzle. I rearranged items about four times before I was happy with how they were all fitting.
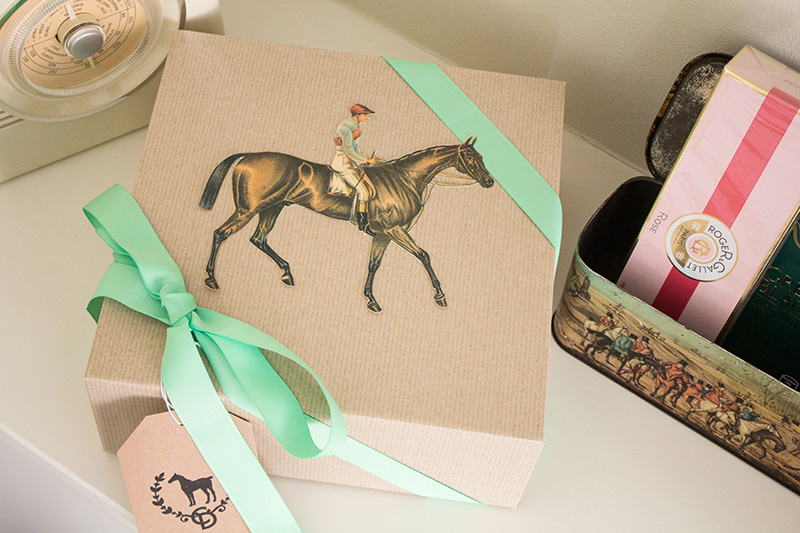
7. Tie a ribbon around the box and attach a gift tag. The gift tags themselves can be elevated to a personalized keepsake should you decide to have a custom monogrammed tag created on leather or metal. The inclusion of these materials would also heighten the equestrian-inspired look.
This is such a fun gift to plan and put together. With so many ways to cater it to your wedding and your bridesmaids’ individual personalities, it is certain to make the day more memorable.
Read the full Horse & Style Weddings ’17 issue online at issuu.com